
Embarking on the crafting journey of making wooden armor in real life is a captivating fusion of artistic expression and practical ingenuity.
Beyond the realms of conventional metal, wood lends its unique charm to this endeavor, offering a tactile and visually striking alternative.
This creative process demands a delicate balance between meticulous design, precision woodworking, and thoughtful assembly.
From selecting the right hardwood to shaping each piece with precision, the artistry extends to the finishing touches that enhance both aesthetics and durability.
This guide unfolds the steps, from conceptualizing a personalized design to testing the final product, inviting enthusiasts to delve into the immersive world of crafting wooden armor.
What Is Wooden Armor?
Wooden armor refers to protective gear crafted entirely or predominantly from wood, offering a unique alternative to traditional metal armor.
While primarily associated with historical or fantasy contexts, wooden armor showcases a blend of craftsmanship and creativity.
Crafters carve and shape hardwoods like oak or maple into components such as chest plates, pauldrons, bracers, and greaves.
Although inherently less protective than metal counterparts, wooden armor serves as an artistic expression, often used in reenactments, LARPing (Live Action Role-Playing), or as decorative pieces.
The process of making wooden armor involves intricate woodworking, detailing, and finishing techniques, resulting in visually compelling and wearable creations.
How to Make Wooden Armor in Real Life?
Creating functional wooden armor in real life involves a combination of woodworking skills, creativity, and an understanding of armor design.
While wooden armor may not provide the same level of protection as traditional metal armor, it can be a unique and visually appealing project.
Here’s a basic guide on how to make wood armor:
Materials and Tools
- Wood
- Protective Gear
- Measuring Tools
- Cutting Tools
- Sanding Tools
- Wood Glue
- Clamps
- Finishing Materials
Steps:
Design Your Armor
Embark on the creative journey by envisioning the design of your wooden armor. Consider the aesthetics, contemplating not only the visual appeal but also the functionality.
Sketch out a comprehensive design, keeping in mind the body parts you intend to protect and the overall symmetry and balance of the armor.
Consider embellishments and details that will not only add to the overall visual impact but also reflect your style or the theme of the armor.
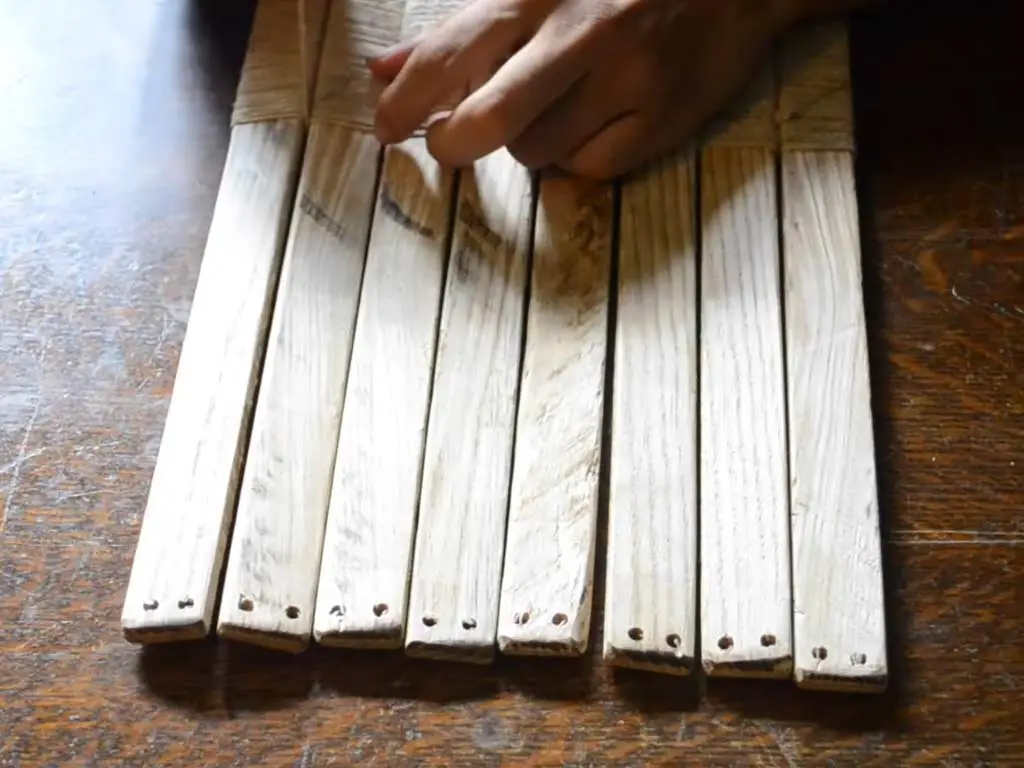
Select and Prepare the Wood

Deliberate on the choice of wood, opting for hardwood like oak or maple for durability.
Carefully select the thickness of the wood based on the specific requirements of each armor piece. Consider the grain pattern and characteristics of the wood, as they can contribute to the overall aesthetic.
Once chosen, execute precise cuts to transform the raw wood into the foundational shapes essential for your envisioned design, paying attention to grain direction for added strength.
Cutting and Shaping
Intricately bring your design to life by employing cutting tools such as a coping saw or jigsaw.
This step demands meticulous attention to detail, ensuring that each piece aligns with your design. Consider the contours of the body when shaping individual components to ensure a comfortable fit.
Additionally, round the edges of the wooden components to enhance both the visual appeal and the comfort of the wearer, paying attention to ergonomic details.
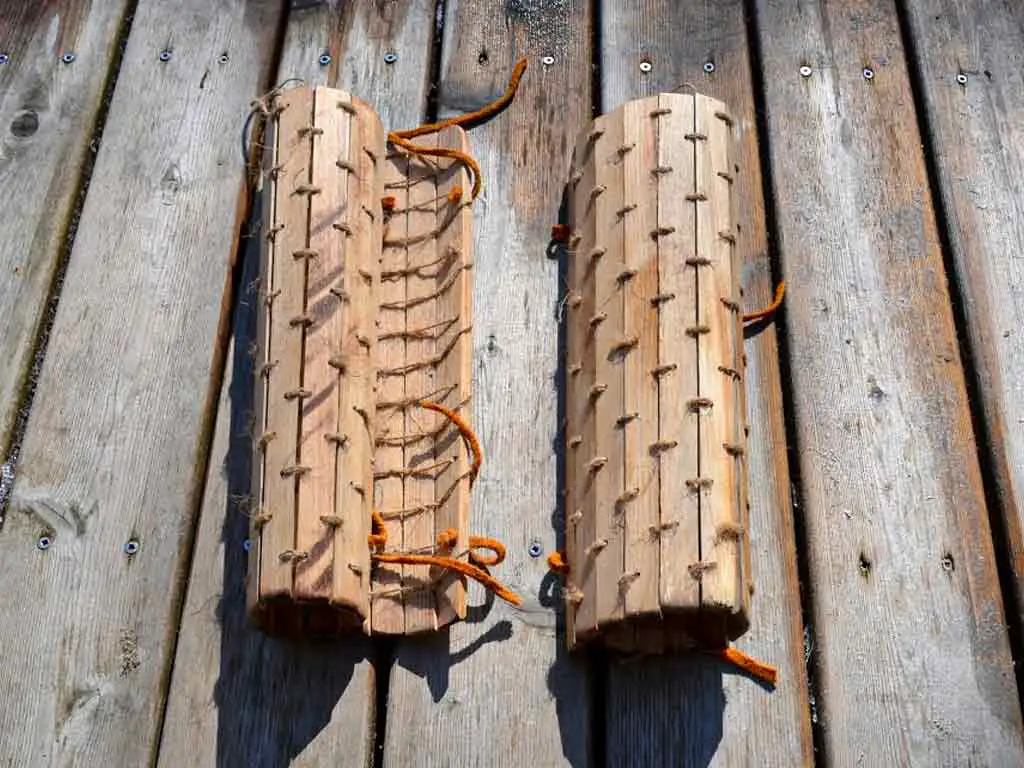
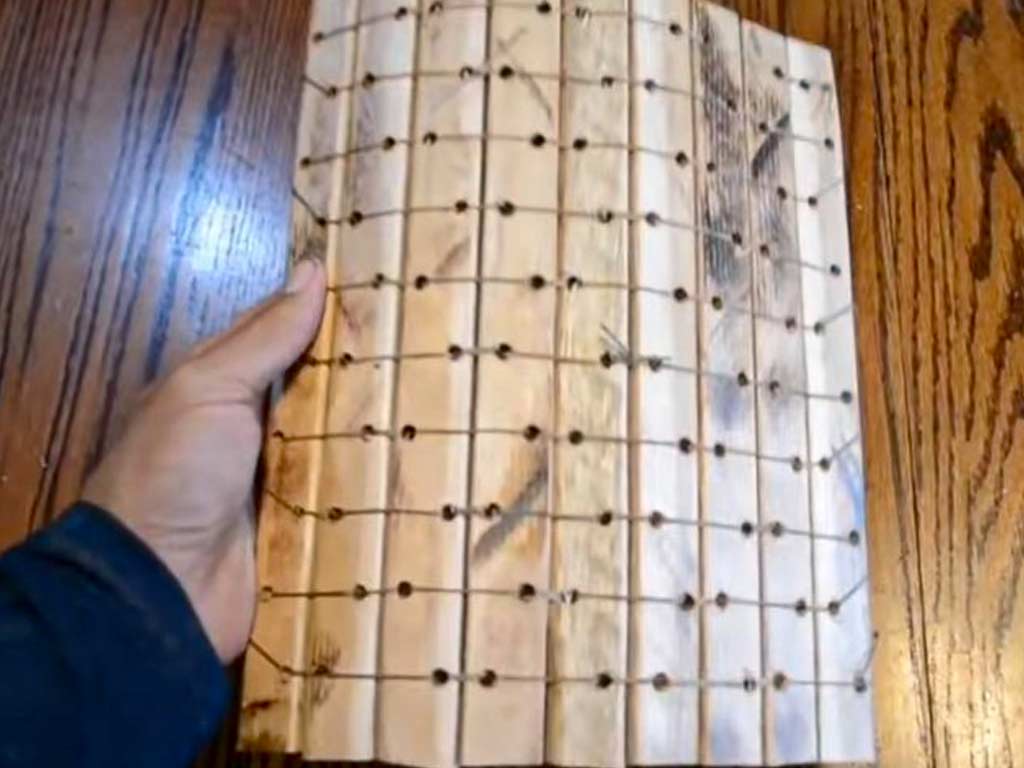
Assembly
Assemble the various components of your wooden armor by applying robust wood glue to the edges that require joining. Employ clamps to secure the pieces firmly in place, allowing the glue to set thoroughly.
Patience is key in this step, as adherence to the manufacturer’s drying time is crucial for the structural integrity of the armor. Consider dry-fitting the pieces before gluing to ensure everything aligns perfectly.
Reinforcement
Strengthen critical areas of your wooden armor by adding extra layers of wood or strategically placed bracing.
This reinforcement ensures that the armor is not only visually striking but also robust and capable of withstanding the demands of wear. Consider the balance between reinforcement and weight, especially in areas that require more flexibility.
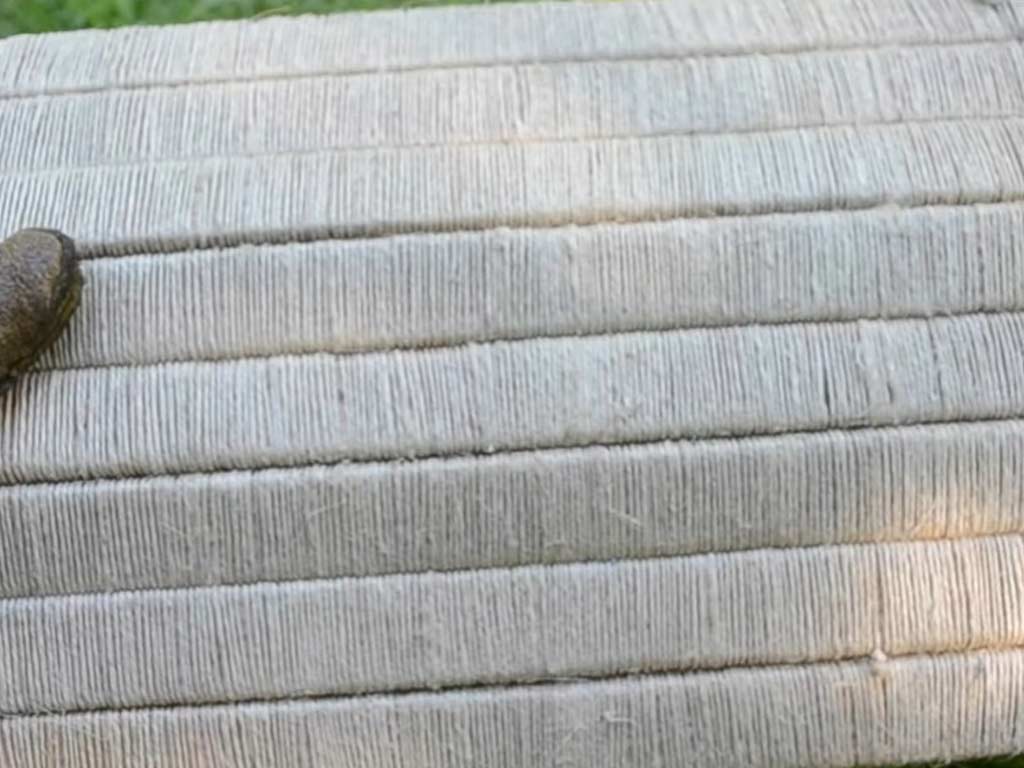
Sand and Smooth
Transition from the construction phase to refinement by meticulously sanding the entire wooden armor.
Smooth out any imperfections or rough edges, creating a polished finish. This not only contributes to the overall aesthetics but also enhances wearer comfort.
Experiment with different grits of sandpaper to achieve the desired level of smoothness and pay attention to details like transitions between components.
Finishing Touches
Elevate the visual appeal of your wooden armor by applying a suitable finish. Whether it’s a wood stain for a natural look, paint for artistic expression, or a sealant for added protection, this step brings your creation to life while safeguarding the wood from environmental factors.
Experiment with different finishes and techniques to achieve the desired look, considering the overall theme and purpose of the armor.
Fittings
Integrate practicality into your design by attaching straps or buckles to secure the wooden armor to the wearer’s body. Leather straps, in particular, offer a balance of strength and flexibility.
Ensure that the fittings provide a secure and comfortable fit, considering the contours of the body.
Experiment with adjustable fittings to accommodate different body types and sizes, ensuring a versatile and customizable final product.
Testing
Conclude the crafting process by donning the wooden armor and evaluating its fit and functionality.
Make necessary adjustments to optimize comfort and mobility, ensuring that the armor not only looks impressive but is also wearable for extended periods.
Consider testing the armor in various poses or movements to ensure it allows for a full range of motion.
Is Wood Armor Real?
Yes, wooden armor, often associated with fantasy settings, historical reenactments, or live-action role-playing (LARP), is a real and tangible creation.
Crafters and enthusiasts have experimented with the concept of wood armor as a unique alternative to traditional metal armor.
While it may lack the protective strength of metals, wooden armor showcases a blend of artistry and practicality.
Craftsmen meticulously carve and shape hardwood, such as oak or maple, into functional pieces like chest plates, pauldrons, and greaves.
Despite its ornamental nature, wood armor is real in the sense that it involves a tangible crafting process, highlighting the fusion of creativity and craftsmanship within the realm of functional art.
Is Wood Armor Effective?
Wooden armor, while real and often visually appealing, is not as effective as traditional metal armor in providing protection.
Wood lacks the durability and resilience of metals, making it less suitable for absorbing or deflecting the impact of weapons.
While it may offer some defense against certain low-impact blows, it is generally not practical for combat situations.
Wooden armor is commonly used in contexts like historical reenactments, fantasy events, or theatrical performances where the emphasis is on aesthetics and creating a specific visual atmosphere rather than on functional protection.
In summary, while wooden armor is real and has its place in certain contexts, its effectiveness in providing actual protection is limited compared to more conventional materials like metal or modern synthetic materials.
FAQs
What types of wood are suitable for crafting wooden armor?
Select durable hardwoods like oak or maple for crafting wooden armor.
These woods provide the necessary strength and resilience for creating functional and visually appealing armor.
Is making wooden armor practical for actual protection, or is it more for decorative purposes?
Wooden armor is more suited for decorative or costume purposes rather than practical protection.
While it adds a unique aesthetic, it may not offer the same level of protection as traditional metal armor.
Can wooden armor be comfortable to wear?
With careful design and fitting adjustments, wooden armor can be made comfortable to wear. Rounding edges, strategic shaping, and proper fitting of straps contribute to wearer comfort.
How long does it take to make wooden armor?
The time required to make wooden armor varies based on complexity, design intricacy, and the craftsman’s skill level.
It can range from a few days for a basic set to several weeks for more elaborate designs with intricate details.
To Recap
In the artful pursuit of crafting wooden armor in real life, the journey unfolds as a testament to both creativity and craftsmanship.
From the initial design sketches to the careful selection and shaping of hardwood, each step requires a blend of precision and artistic flair.
The assembly process, marked by the bonding of wooden components, reinforces not only the structure but also the commitment to the artistry.
Through meticulous sanding, finishing touches, and thoughtful fittings, the wooden armor emerges as a unique, wearable piece of functional art.
The testing phase, where comfort and mobility are optimized, signifies the culmination of a labor-intensive process, inviting enthusiasts to embrace the distinctive allure of wooden armor creation.
Leave a Reply